

A working GPS dog fence takes about 1 to 2 hours to set up if you follow four steps in order: charge and pair the collar, install the app and grant its permissions, draw a simple boundary, and physically test it before letting your dog off leash. Training your dog to respect that boundary reliably takes longer, usually over multiple days of short daily sessions.
Do these three things first:
- Put the collar on its charger and confirm the LED shows a full charge before pairing.
- Download the companion app, create an account, and allow Bluetooth and location access.
- Draw a basic boundary shape (a rectangle or oval, not a complex outline) and walk it once before your dog ever wears the collar.
Quick reality check: accuracy depends on your yard’s terrain and tree cover, and no GPS fence works well the first day without supervised testing. Containment itself typically requires no ongoing subscription; a paid plan usually unlocks live tracking and escape alerts, not the core fence.
Key Takeaways
A working GPS dog fence combines a properly paired collar, a simply drawn boundary, and a tested, flagged perimeter, with reliable training layered on top over one to two weeks.
| Point | Details |
|---|---|
| Setup timeline | Charging, pairing, and drawing a basic boundary typically takes 1 to 2 hours total. |
| Test before trusting | Walk the full perimeter at dog head-height and flag every point where the warning triggers. |
| Training takes longer | Staged on-leash to off-leash training generally runs 14 days before full reliability. |
| Environment affects accuracy | Tree canopy and nearby metal structures cause the most drift and false triggers. |
| Havenfreedom’s approach | Dual-band positioning and subscription-free containment target the exact drift and cost issues covered above. |
Table of Contents
- What to Gather Before You Start the Setup
- How Do You Set Up a GPS Dog Fence Step by Step?
- How Do You Train a Dog to Respect a GPS Fence?
- Why Does Fence Accuracy Vary by Yard?
- How HAVEN Freedom Applies These Setup Steps
- The Setup Advice Most Guides Get Backwards
- Get a Fence That Handles Real Yards, Not Just Flat Ones
- Frequently Asked Questions
- Sources
What to Gather Before You Start the Setup
Half of the frustration with wireless fence setup comes from skipping prep, not from the technology itself.
Here’s your pre-setup checklist:
- Charge the collar fully. Most units show a solid light when charging and a different color or blinking pattern when full. Check your manual for the exact signal and expected charge time, usually two to three hours for a full cycle.
- Install the app and enable permissions. Bluetooth and location services need to stay on, and it’s worth checking for a firmware update before you do anything else.
- Gather your physical supplies. You’ll want boundary flags, a standard leash, small treats, and ideally a second person to help during the first walk test.
- Scout your yard. Note where trees form heavy canopy, where metal sheds or chain link sit near your planned boundary, and pick a clear, open area for the earliest training reps.
- Decide on subscription timing. Base containment works without one, so you can enable live tracking or escape alerts later once you’ve confirmed the fence holds.
Pro Tip: Charge the collar the night before setup day. A dead battery mid pairing is the single most common reason first attempts stall out.
How Do You Set Up a GPS Dog Fence Step by Step?
This is the sequence that gets you from a sealed box to a tested, working boundary.
1. Unbox and inspect. Lay out the collar, charging base or cable. Check for visible damage, then put the collar on its charger immediately. Full charges commonly run two to three hours, so start this before anything else.
2. Download the app and create your account. Accept the permission prompts for Bluetooth and location, since the app can’t draw an accurate boundary without them. If a firmware update appears, install it now. Vendor onboarding guidance is consistent on one point: don’t remove the collar from its base while a firmware update is running, since interrupting it can corrupt the install, as Invisible Fence’s onboarding documentation notes.
3. Pair the collar. Put the collar into pairing mode (usually a button hold), then follow the app’s on-screen prompts. Watch for the LED sequence that confirms a successful Bluetooth handshake and check that both battery and signal indicators look normal before moving forward.
4. Position any base unit correctly, if your system uses one. Keep it away from metal siding, large appliances, and dense structures, and place it as high and open to the sky as reasonably possible. Signal quality drops fast near reflective or metal surfaces.
5. Draw your fence in the app. Keep the shape simple, a rectangle or gentle oval rather than a zigzag. Vendor guidance from PetSafe recommends placing digital fence posts at least 25 feet from structures and avoiding narrow corridors where two boundary lines run close together. Name the fence something obvious like “Backyard” so you can find it later, and save it.
6. Assign your dog and configure the warning zone. Set the width of the warning buffer before the boundary line itself, and choose your correction type, tone, vibration, or optional static, based on your dog’s temperament and training history.
7. Test before you trust it. Walk the entire perimeter yourself, holding the collar at roughly your dog’s head height, and note exactly where the first warning tone triggers. Then:
- Place a physical flag at every point where the warning first sounds.
- Repeat the walk from at least three different directions.
- Confirm the warning fires consistently at the same spots each pass.
- Only move to supervised on-leash training once results repeat reliably.
If the boundary line and your flags don’t match up closely, adjust the shape in the app and re-test before involving your dog at all.
How Do You Train a Dog to Respect a GPS Fence?
Training is where most GPS fence complaints actually originate, not the hardware. A dog that’s never learned what the tone means will ignore it, run through the correction, or panic and bolt.
Start on leash. Walk your dog toward a flagged boundary point, let them hear the warning tone, and immediately redirect them back toward the yard with a treat and praise. Repeat this at multiple flagged points over several short sessions rather than one long one. Vendor training programs typically span about one to two weeks before recommending off-leash trials, and that timeline exists for a reason: dogs need repetition to build a reliable association, not a single dramatic lesson.
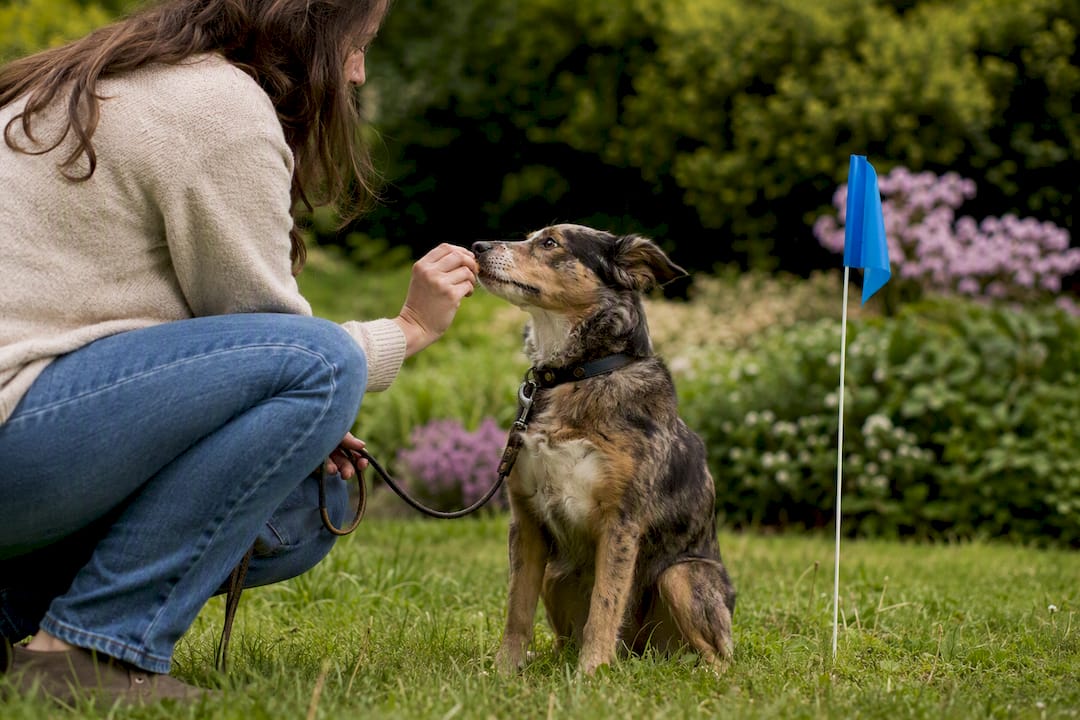
Keep sessions short, 10 to 15 minutes twice a day. Use the same command every time your dog approaches the boundary, and reward calm retreats generously. Avoid punishment-based corrections layered on top of the collar’s built-in tone or vibration; that combination tends to create anxiety around the entire yard rather than clear boundary awareness.
Once your dog responds consistently on leash, move to supervised off-leash trials in the same tested areas before expanding anywhere else.
Verification checklist, ongoing:
- Re-test after any firmware update.
- Re-test after seasonal changes (leaves filling in canopy, snow accumulation).
- Re-test after any change to landscaping, fencing, or nearby structures.
- Test at different times of day, since satellite visibility can shift slightly with cloud cover and sun angle.
Pro Tip: If your dog hesitates consistently at one flag but breezes past another, that’s not defiance. It usually means the warning zone is inconsistent at that spot, which is a signal to re-test the geometry, not increase the correction level.
Why Does Fence Accuracy Vary by Yard?
Most “my fence isn’t working” complaints trace back to three culprits: tree canopy, metal structures, and overly complicated boundary shapes.
Dense tree cover blocks satellite signal the same way it blocks sunlight, and that’s exactly where multi-constellation earns it's reputation, since it can pull from a wider range of satellites and hold accuracy better under canopy than single-band hardware. Metal roofs, chain link, and large appliances near your boundary line can also cause drift, small but real shifts in where the fence line actually sits versus where you drew it.
If you’re seeing false triggers or drift:
- Simplify the fence shape, straight lines and gentle curves outperform sharp corners.
- Re-walk and re-flag the boundary rather than assuming the app’s drawing is correct.
- Confirm the collar sits snugly and consistently on your dog’s neck, since a loose fit can affect antenna orientation.
- Check that firmware is current before assuming it’s a hardware fault.
Battery life also shifts with usage. Base containment alone typically sips less power than modes running constant live tracking, so expect shorter active hours when tracking features are switched on. Charge on a consistent schedule rather than waiting for a dead battery warning.
Before contacting support, write down your firmware version, the exact steps you took, and the specific yard locations where problems occurred. That single habit cuts most troubleshooting calls in half.
How HAVEN Freedom Applies These Setup Steps
Havenfreedom built its collar around the exact pain points covered above rather than treating them as edge cases.
- Dual-band positioning targets the canopy and drift issues that trip up single-band systems, holding a steadier boundary line under trees and near irregular terrain.
- App-based fence drawing follows the same simple-shape logic vendors recommend, letting you name, save, and adjust boundaries without buried wire.
- Subscription-free containment means the core fence works the moment setup is complete; a plan is only needed if you want live tracking or escape alerts layered on top.
- Dog finder system combines sound, light, and Bluetooth radar, useful if a boundary test or training rep doesn’t go as planned and your dog wanders farther than expected.
HAVEN Freedom’s dual-band positioning system is built specifically to hold its line where single-band hardware tends to drift, under heavy trees, near structures, on uneven ground, which is exactly where most GPS fence complaints originate.
Setup documentation and device specs live on the HAVEN Freedom product page.
The Setup Advice Most Guides Get Backwards
Most GPS fence content treats hardware specs as the whole story: satellite count, battery hours, waterproof ratings. That’s backwards. The single biggest predictor of whether a fence actually works is whether the owner tested it properly before trusting it, and most owners skip that step entirely because it feels tedious compared to just drawing a shape in an app and calling it done.
The conventional advice also underplays terrain. A fence that performs flawlessly in an open suburban lot can drift meaningfully under a wooded canopy or near a metal outbuilding, and no amount of app polish fixes that if the underlying hardware can’t hold a steady signal there. Dual-band positioning matters more in real yards than in marketing copy, because real yards have trees, sheds, and slopes that lab conditions don’t.
If you take one thing from this guide, let it be this: walk your boundary with flags before you ever clip the collar on your dog. Skipping that step is where almost every bad experience with wireless containment actually starts, not the technology itself.
Get a Fence That Handles Real Yards, Not Just Flat Ones
If you’ve read this far, you already know the setup itself isn’t the hard part, getting a boundary that holds steady under trees and near structures is. That’s the specific problem Havenfreedom’s collar is built to solve, with dual-band positioning designed to reduce the drift that trips up simpler hardware in exactly the conditions most yards actually have.
You get subscription-free containment from day one, with live tracking and escape alerts available as an add-on only if you want them later. The dog finder system, combining sound, light, and Bluetooth radar, gives you a fallback if a training rep or a storm ever sends your dog farther than planned. Pair that with a properly fitted collar (a well-sized semi-choke training collar helps during early leash training reps) and you’ve got the full setup covered. Check specs and start your setup on the HAVEN Freedom product page today.
Frequently Asked Questions
How long does GPS dog fence setup actually take? Most owners get a basic boundary working in 1 to 2 hours, covering charging, pairing, drawing the fence, and initial testing. Full training to off-leash reliability takes another 1 to 2 weeks.
Do I need a subscription for a GPS pet containment system to work? No. Core containment on Havenfreedom works without a paid plan. Subscriptions typically unlock live tracking and escape alerts, not the base fence itself.
Why does my GPS fence line seem to shift or drift? Drift usually comes from tree canopy, metal roofing, or overly complex fence shapes. Simplifying the boundary and keeping posts away from structures typically resolves it.
Can I install a GPS dog fence myself, or do I need a professional? Installing a GPS dog fence setup is designed for self-installation. The process involves charging, pairing through an app, and drawing a boundary, no burial or professional installer required.
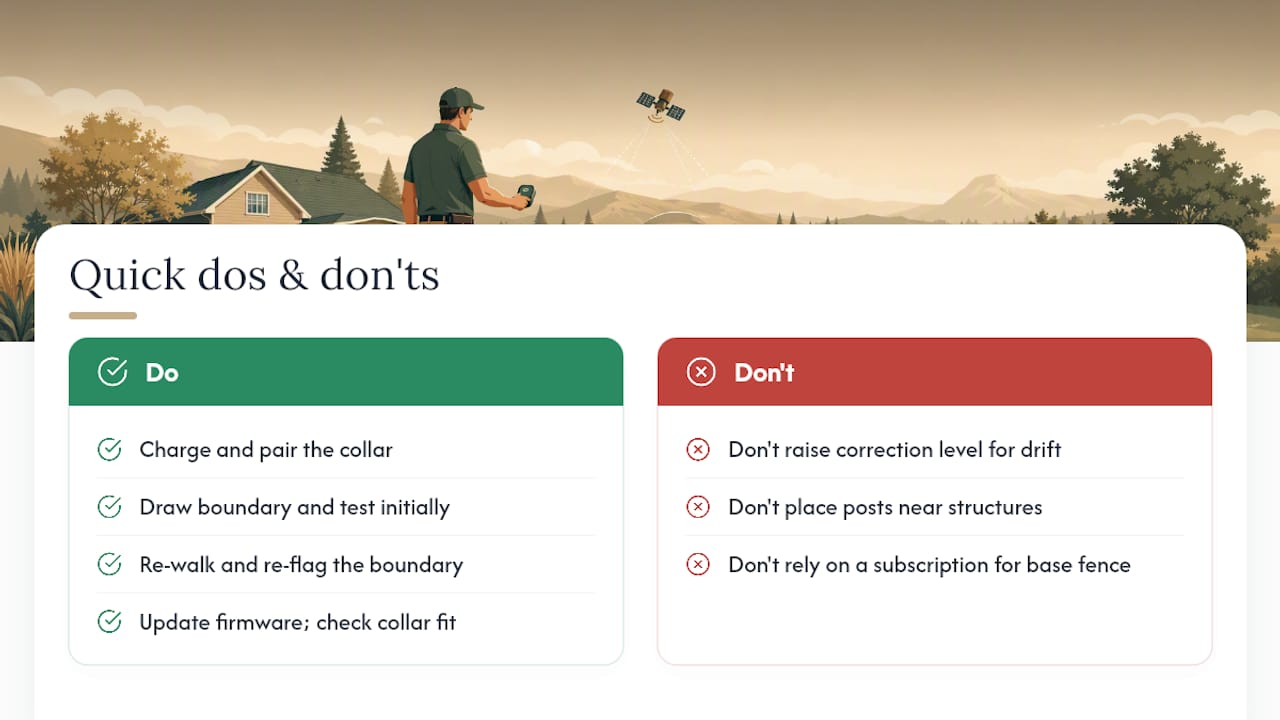
What should I do if the fence warning triggers inconsistently? Re-walk and re-flag the boundary, confirm firmware is current, and check collar fit. If inconsistency continues under canopy or on slopes, contact support rather than increasing the correction level.
Sources
- Best GPS Dog Fences of 2026: Accuracy-Ranked Top Picks
- How to Onboard and Set-Up | Invisible Fence® GPS Collar
Recommended
Keep reading
en
Puppy E-Collar Age: When Is It Safe, and What to Use First
No vet-backed minimum age exists for shock collars on puppies. See what vets advise, what to do before 6 months, and how a GPS...
Read the postcharge dog collar camping
Charging a Dog Collar at Camp: Skip Bedding, Use a Hard Surface
Charge a dog collar safely at camp with a power bank, original cable, and solar or car backup. Follow National Park Service battery safety...
Read the postYour adventure starts here
Ready to give your dog more room to roam?
Give your dog more freedom to explore — and give yourself the reassurance of knowing they're never far away.
